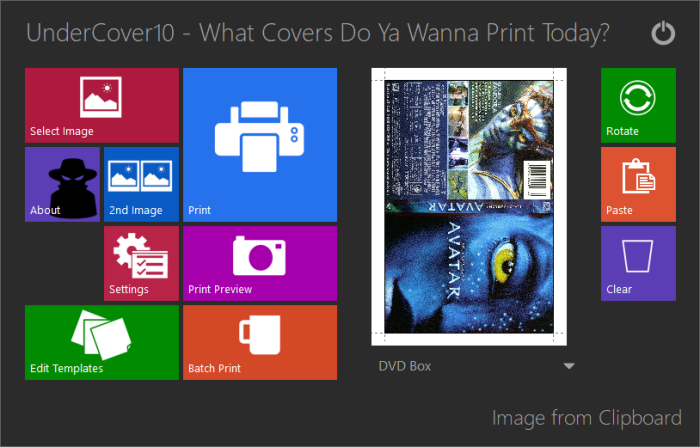
Getting started
1) Click on the preview window or Select Image button.
2) Browse to the cover you want to print and select it.
3) The preview window shows the image as it will be printed. The format is automatically detected and applied. If not correct you can change it using the dropdown list below the preview.
4) Hit the Print button to print the cover.
Predefined templates
UnderCover10 comes with templates for most common formats.
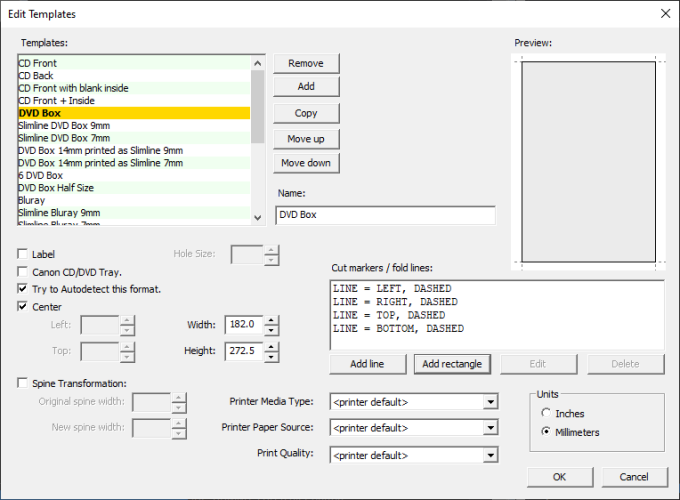
Format editor
If the predefined templates not (completely) suit your needs you can changed them in the format editor. You can change, rename, delete, copy or create new templates.
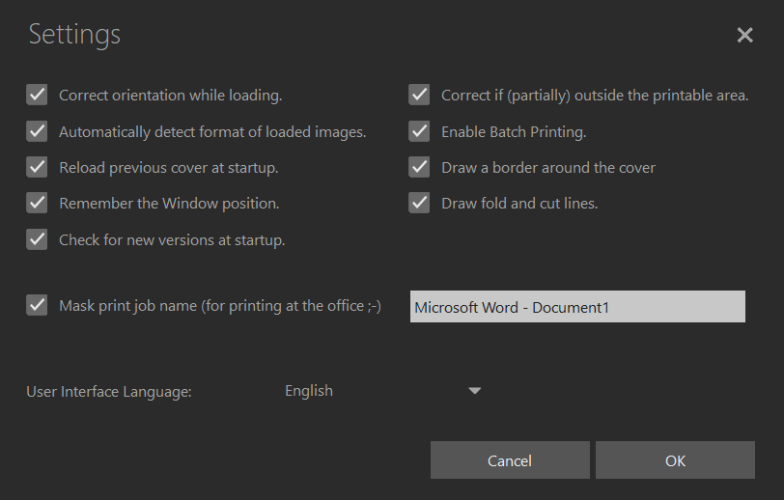
Settings
There are several options available in the Settings screen. Use the Settings button to access the screen. The following things can be changed:
Correct orientation when loading
If for instance a DVD cover is oriented horizontally it does not fit on a A4 or Letter sheet. Checking this option will automatically rotate such an image to fit.
Automatically detect format of loaded images
Based on the aspect ratio the format of the loaded image will be determined and the correct format will be applied if this option is checked. If it is not checked the last used format will be used by default.
Mask print job name (for printing at the office ;-)
When printing on a network everybody can see which application you are using and which file you are printing. Checking this option you can "mask" this, e.g. using the default 'Microsoft Word - Document1' identification.
Reload previous cover at startup
When this option is checked the cover you last used when closing UnderCover10 are reloaded when UnderCover10 is started again.
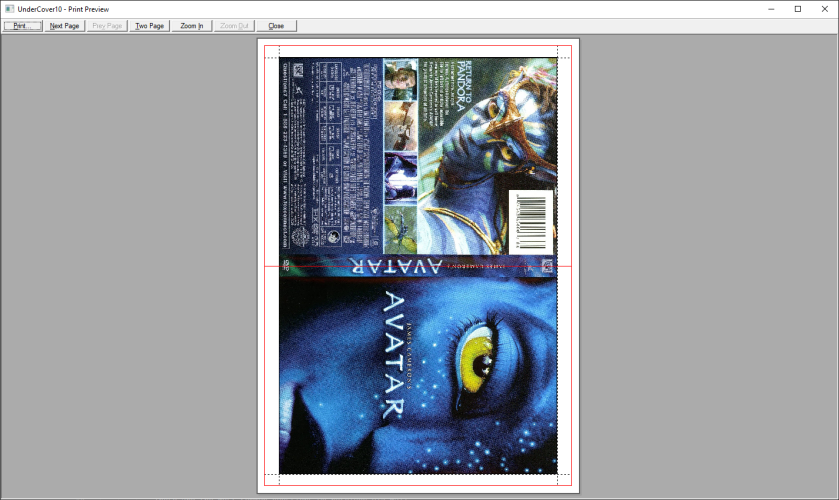
Correct if (partially) outside the printable area
This option tries to move the image if the settings of the selected format position one side of the image outside the printable area of your printer. The printable area can be viewed in the Print preview. It is indicated by a red rectangle. In the example below the DVD insert is positioned outside the printable area at the bottom of the paper. This would result in a cut-off print if not corrected. There is space at the top to shift the image up to make it fit.
Enable Batch Printing
Checking this option enables dropping of multiple files on the (left) preview window of UnderCover10 or selection multiple files in the File Open dialog. The format of the files will either be autodetected or all forced to a specific format. This can be set in the dialog which will be shown before printing.
Draw a border around the covers
This option results in a black border drawn around the printed covers. Especially light covers will benefit as you can see the actual cover dimensions of the printout.
Check For new versions at startup
Selection this option results in a message at startup when UnderCover10 detects there is a new version available on the UnderCover10 website.